“What camera should I get?” is a question that we get asked a lot at Arqspin. It’s an important one, but the question you should really be asking is this: “what photography lighting should I get?”
Having the newest camera can make a big difference if you’re in a low light scenario or shooting objects in motion, but you won’t face these situations when taking product photography. If you have any modern DSLR, point-and-shoot, or even a smartphone, it’s likely that investing in lighting will improve your product photography more than investing in a new camera.
For those of you looking for a quick answer we offer the Arqbox Luminous Light Tent – a portable photography studio available in two sizes: 15.5″ and 23.5″. For larger scale applications or more customizability, we recommend this kit for $400. Otherwise, read on to learn more.
We’ve touched on lighting in several of our posts, but here, we’d like to do a deep dive into the topic as well as propose some clear options for different budget ranges.
Remember that a camera simply records the light in a scene. There is no other magic to it. So it’s important that the light in the scene is setup in a desirable manner.
Sunlight
If you have a window that gets a good, constant amount of sunlight on most days, it could be a reliable source of lighting. But the issue with sunlight is that you can’t control it. If you need to photograph products on a day when the weather is being uncooperative, you may not be able to complete your job. Furthermore, moving clouds can cause variance in brightness as well as color balance that can make capturing uniformly lit product images difficult. Very cloudy, overcast days are best as this produces more even diffuse light that is easier to work with.
Light Bulbs
Light bulbs come in many different types, styles, powers and color temperatures. This can be confusing. There are two major types of lights you can use: traditional lights and studio lights.
Traditional Lights
These are the light bulbs for everyday use in your lamps and fixtures at home. They’re inexpensive, easily available, and can create good product photos if used properly. There are two types of traditional lights: incandescent and fluorescent.
Incandescent bulbs (the ones that are normally round) are being gradually phased out in the US as fluorescent bulbs (normally spiral or “pig-tailed”) are more energy efficient and last longer. Incandescent bulbs have a lower color temperature and appear warmer (more yellow) than fluorescent bulbs. If you’re looking at the number on the packaging, a 15-watt fluorescent bulb can produce around the same amount of light as a 60-watt incandescent bulb. These are good wattages to start with — not too bright and not too dim.
Here are a few more things to consider when selecting bulbs:
- When using multiple lights, make sure the bulbs are all the same color temperature. To do this, simply buy 2 identical bulbs from the same manufacturer.
- “Daylight” balanced bulbs have a color temperature of around 5,000K and can be used if you are photographing in a room where daylight is also entering through a window. This will help ensure that all of the light hitting your product is the same color temperature and will avoid color casts. But we still recommend photographing in a controlled environment without windows where you control the lighting.
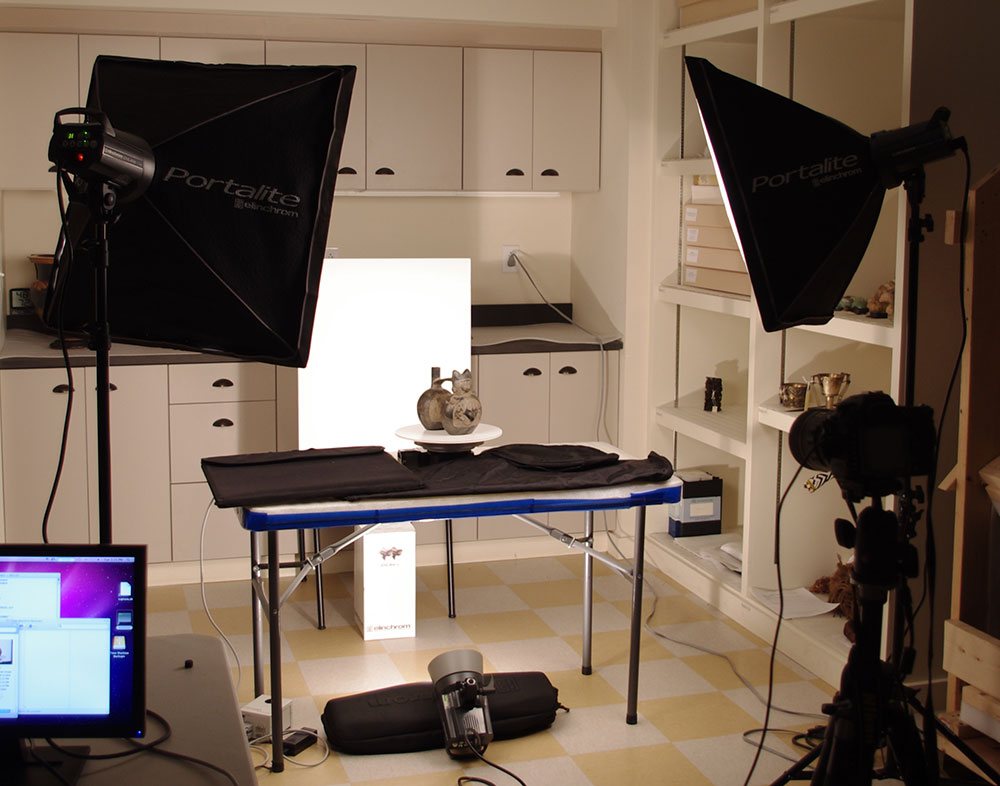
Studio Lights
These types of lights solve many of the drawbacks of traditional lights. With studio lights, you get variable brightness, adjustable heads, and the ability to easily mount a diffusor.
There are three main types of studio lights: Florescent, LED and Tungsten.
- Florescent: These lights are energy efficient but give off a relatively low output of light, usually around 60-100 watts. The bulbs are readily available, cheap and easy to replace.
- LED: LED lights are very energy efficient and produce very little heat. They are composed of lots of small “light emitting diodes” (LEDs) and generally last a long time.
- Tungsten: Tungsten (or “tungsten halogen”) lights offer the highest output levels but also generate a lot of heat. The bulbs are fairly inexpensive to replace but can change color temperature if brightness levels are adjusted.
If you’re using traditional lights, you can purchase a bulb fitting with a cord attachment from your local hardware store. This will allow you to position your light closer to the object you’re lighting.
Studio lights will include a mount, and you can select from the different stands available based on your needs. For more information on how to position your lights, read Top 7 Product Photography Tips and Photographing Reflective Objects.
Diffusion
As we’ve discussed here before, diffusion is the process of softening the light from your bulbs to produce a less harsh (more “diffuse”) distribution of light. This gives a more professional look to your shots and avoids harsh shadows and specular highlights. Diffusion is a critical component of your product photography studio.
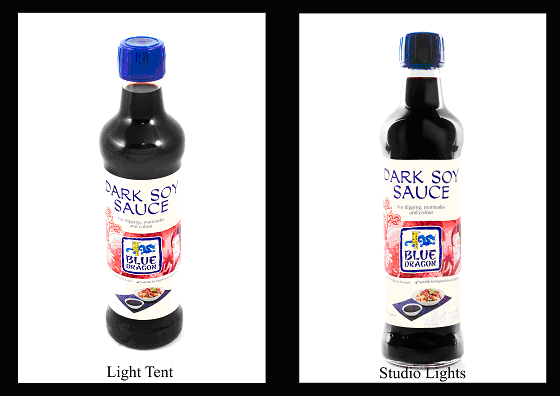
Studio lights with soft boxes create significantly better output than light tents
Diffusion Sheets
This is one approach to diffusing your photography lights. Simply suspend a layer of some type of light-diffusing material in front of the bulbs. White nylon fabric or frosted plastic sheets make good diffusion materials. Even wax baking or tracing paper can be used in a pinch. Photography stores will, of course, sell diffusion panels of various shapes and sizes.
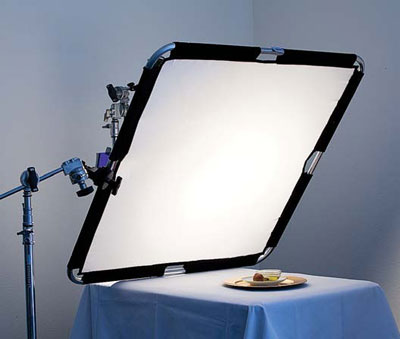
The main drawback to diffusion sheets is that setup can be tricky and require to create your own setup of clamps and stands.
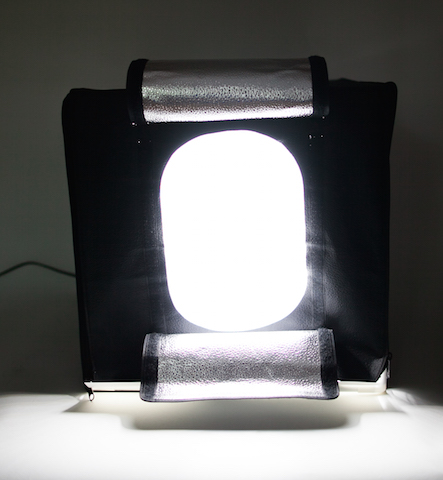
Light tents
This alternative to diffusion sheets are relatively inexpensive and quick to setup. They also produce reasonable results in our experience. The main problem with using a light tent is that they bounce a lot of light around inside, which can create a result that looks flat.

Soft boxes
These are the best diffusion method if you can afford the additional expense. They are easily attachable and sturdy, and they can be quickly set up and adjusted.
Recommendations
As we’ve discussed above, for product photography, lighting is 95% of the battle. Now, let’s talk budget and provide some links on good lighting solutions.
If you have $100 or less to spend, here’s the setup we recommend:
- 2 clamp lamps – Buy here
- 2 26W/120V bulbs – Buy here
- A diffusion panel (Buy here) or nylon fabric (Buy here)
- 3-4 spring clamps (Buy here).
If you have a little more than $100 to spend, and are looking for a super convenient setup, we offer the Arqbox portable photography light tent. It features:
- 2 Strips of flicker-free color corrected LED lights
- Highly reflective interior ensures uniform lighting
- Multiple access points
- 3 Backdrops (white, black and beige)
- Carrying case for easy storage or transport
Many brands offer a variety of mid-priced lighting kits. Lastolite, Interfit and Impact are all good brands that have a wide array of kit options.
And if you have $1,000 or more to spend on lighting, we’d recommend a 3 light LED kit, like this one. It includes:
- 2 SpectroLED-14 LED lights
- 1 SpectroLED-9 LED ights
- 3 Light stands
- 2 Remote dimmers
- 1 5.4′ Mini boom (useful for lighting from above)
Hopefully this article has helped you become more aware of the importance of photography lighting and offered an option that fits your budget. As always, if you have any additional questions, please feel free to reach out to us.
Getting good at taking static product photography? Consider Arqspin, the interactive 360 product photography solution that will take your web presence store to the next level.